-

7 Tips to Save Money at Home while Traveling
May 18, 2018It’s that time of the year again. The sun is starting to peek behind the clouds, flowers are blooming, and birds are deciding its okay to wake you up at 3 AM with a song. So you know what that means. It’s time to get the heck out of here and take a vacation, or as the British call it, a holiday. Below are a few tips about your lights, water system and household appliances to save both energy and money while you're away. Tip 1: Thermostats are Cool Setting your thermostat for the appropriate temperature or turning off your air conditioning is essential. For summer vacations, set the furnace to a low temperature and if you have central air, set it to a high temperature to make sure it doesn't turn on until you get back. During winter months, thermostats should be set at 50° F to ensure pipes and appliances don’t freeze. Programmable thermostats are especially handy during vacations as your appliances do all the work for you. It may also be helpful to close doors around your house to keep individual rooms better insulated. Tip 2: Plug it Out, Plug it Out Unplug any nonessential appliances or gadgets as most devices still consume energy as long as they’re plugged in, even if they’re turned off. Devices such as toasters, televisions, and coffee makers are known as “energy vampires” because of this. The good news is you don’t need any holy water or garlic to scare these energy suckers away; simply unplugging them will work. Pumps are generally an appliance that you won't want to unplug while you're away, but you might be able to save energy on some on-demand systems. For instance, re-circulating pumps designed to deliver immediate hot water to your tap can have the accompanying timers turned off for potential energy savings. A popular re-circulating pump with an easily disabled timer is the Laing LHB08100085. Some booster pumps designed to provide extra pressure at the tap, such as the Grundfos MQ series pumps have sensors that can be disabled. Keep in mind that you should only disable the sensors if you use your booster pumps specifically for extra tap pressure; if you use a booster to evacuate rainwater or another similar application you need those pumps fully functional. Tip 3: If you try to steal a jacuzzi you might end up in hot water As much as it may hurt, turning off that boiling but somehow incredibly relaxing hot tub while you’re gone could shrink your next bill. Water heaters generally account for 15-20% of your bill so switching off the breaker to your water heater could help save you a ton. If you have a gas model and not an electric water heater, switch your heater to its pilot setting. Tip 4: Is your refrigerator running Because you should probably ahhhh....you know the rest.... Refrigerators are among the biggest consumers of energy. Adjusting your refrigerator to 42 degrees and the freezer to 5 degrees is a warmer but food-safe temperature. Determine what food you should keep and what food is perishable. Packing your freezer actually increases efficiency as well. If you’re particularly daring and going away for an extended period of time, you can turn your refrigerator off to save energy and prop the doors open with a dish. Remember to clean the shelves before you leave to prevent any bad smells. Also it’s probably time you threw out that two week old plate of lasagna anyway. Tip 5: What did the curtain rod say to the blinds Nice shades. A simple but super helpful thing to do while on vacation is to close your curtains and shut your blinds. Heat can enter your home through windows and closing curtains helps to conserve heat energy. Closing your curtains keeps heat in during the winter and heat out during the summer. This will also help your air conditioner do less work to cool the house down after you return. Tip 6: Text Alerts Are Your Friend One of the wonders of our modern technological society is that as long as you have a phone and some data, there is very little information that is out of your reach. That includes the status of your pumping system. Pump alarms have long served to let users know when the groundwater level in a pit becomes untenable. Now you can receive both SMS text alerts and emails to your phone when the alarm sounds. One of the most popular alarms is the Liberty NightEYE which is wireless enabled and includes a snap-on float switch. The NightEYE is built for use with an indoor Liberty sump pump and can send texts, emails or push alerts to up to four different contacts using cloud technology. Compatible with both Apple and Android, the NightEye is just one option to make sure you know the state of your system when you're away from home. An smart alarm will save you money in the long run by making sure you don't have to replace aspects of your system. Tip 7: Let There Be Light Many people leave a precautionary light on while they’re away to ward off burglars. Having programmable lights can save you lots of energy. Instead of a light being on all day, having an automatic or sensor equipped light that turns on when the sun goes down can be just as effective and more energy friendly. So I’ve done all those tips, what now You've made it through a bunch of helpful tips...and a few bad jokes....but finally we’ve arrived at perhaps the most important tip: enjoy your vacation and don’t stress! Stretch out on the sand, put on that one Jimmy Buffet song, and enjoy a drink that comes with a free mini umbrella.
-
The Inner Workings of a Basin Buyers Guide & Review
May 16, 2018Basins are more than just over sized looking garbage cans. They’re your pump’s home. In your home you probably have nice drapes, maybe a trophy of that really big fish you caught last summer at the lake, and that leather couch in the living room that has somehow outlasted two cars. Similarly, a basin is made up of several elements that make your pump run efficiently and feel at home. These heavy duty containers are commonly constructed of fiberglass or high grade plastic. They serve a variety of system types (simplex or duplex), sizes and applications. Some basins operate with multiple types of pumps while others are designed to be paired with a specific pump. The first and most important step in selecting a basin is making sure it’s fitted for your pump’s size. For instance, a basin that is too small could fill up rapidly and contribute to improper pump cycling. If the pump turns on and off repeatedly, it will quickly burn out. Longer downtime between pump cycles keeps the pump cooler and results in longer life. With that in mind, let’s explore the inner workings of what goes on inside your basin. Water enters the basin from the inlet. This is the opening located on the side of the basin. If your pump is automatic, once the basin starts to fill with water the float switch will raise which in turn will switch the pump on. Once the pump is on, the water will be pumped out of your system and exit through the discharge. A check valve should be located on your discharge line. The check valve keeps water from returning into the basin, preventing back flow. Back flow can result in wastewater coming up through your sinks, shower drains, and toilets. A pump without a check valve can also suffer from short cycling. The access cover is the lid of the basin. The biggest benefit of having a lid on your basin is unquestionably keeping that not-so-fresh smelling wastewater inside the basin instead of permeating through your basement. On the access cover there should be an opening for a vent, to regularize pressure within the basin, and another opening for the pump’s power cord. Some basins come in with an alarm fitted on them as well. The alarm’s purpose is to give owners advanced warning on any emergencies with their pump. Basins are integral in providing an environment in which your pump can work at an optimal rate. Pumpproducts.com sells a variety of basins from the most trusted brands in the industry.
-
Why is My Submersible Well Pump Short Cycling?
May 8, 2018Welcome back to another edition of Inspector Pumphead’s Quick Tips! In this space I, Inspector Pumphead, will be dispensing wisdom regarding your pump, whether it be about performance, maintenance, repair parts or navigating our site to find a new product, I’m here to help! Today we’re going to be talking about short cycling. Is your pump turning on and off so fast it’s bringing you back to your strobe light-disco days, complete with afros and bell bottoms No Just me Sometimes the Inspector likes to think back to simpler times when he had a full head of hair. But I digress. Let’s talk about some common causes and fixes for your short cycling submersible well pump. Short cycling is when a pump turns on and off too rapidly. Not only can short cycling result in pump failure, but it can harm the rest of your system as well. Short cycling can occur for a number of reasons. One of most common reasons for short cycling is a loss of air in the water pressure tank. This is especially common in older, non-bladder pressure tanks. For these older tanks, the solution to this problem entails repairing the water tank air volume control. If you have a more modern tank, your tank’s bladder may be damaged, which means it won't be able to hold pressure properly and will need replacing. If the tank is damaged in any way, replacing it as soon as possible should be a priority so the rest of your system doesn't become stressed. Short cycling can also occur because of the state of some of your pump’s components such as the pressure switch and check valve. You will want to examine these parts for wear and tear as they may be the culprit. The settings on your pressure switch may need to be readjusted or the switch could potentially need replacing if damaged. Your pressure tube may be clogged due to hard water or sediment in the system so this is something to check as well. A failed check valve means your system will not be able to hold pressure when the pump shuts off, which means this part may also need replacing. If you've tested your pump's components and they are in working order, something as simple as a leak in your system may be responsible for your pump's malfunctioning. It's important to look for damp spots around your system. If you are still unsure of the problem, or which repair part you need, you can always consult and schedule an appointment your local plumber or professional. PumpProducts.com sales specialists are standing by to help you find the right pump or part, as well as to provide price quotes, stocking availability and shipping information. Call our toll free number 1-800-429-0800 to speak to an expert today.
-
Replacing the Mechanical Seal on Your Centrifugal Pump
April 25, 2018It is I, Inspector Pumphead! I return this week to share some of the knowledge that’s inside my oddly shaped head, specifically the knowledge on how to replace the mechanical seal on your centrifugal pump. The main purpose of the mechanical seal is to prevent leakage. They are a particularly important element of your pump because mechanical seal failure is responsible for a majority of pump malfunctions. By following these simple steps, you will be able to replace the mechanical seal in your pump so it experiences as little down time as possible. The first step of replacing your seal, is to make sure the power to your pump is off because safety is always the first step. Next, disconnect the pump from the plumbing system by using a PVC saw. Place the pump on a table or spacious work area. Using a wrench, unscrew the bolts on the pump housing. Detach the pump’s motor shaft from the housing. Make sure to keep track of the bolts you unscrew! Dismantling the pump’s impeller is the next step, as the seal is located on the shaft behind the impeller. While holding the shaft in place, rotate the pump’s impeller counterclockwise with the wrench until it disconnects from the shaft. Part of the old mechanical seal will be attached to the impeller, while the other part will still be attached to the motor shaft. Remove both of these pieces. Now it’s time to put on the replacement seal. Slide the new mechanical seal along the shaft of the motor. Do not touch the front face of the seal, as it is highly sensitive to the oils on your fingers. Once the new seal is on the shaft, use the wrench once again to screw the impeller back on. After this, reattach the pump housing and motor by tightly screwing in the bolts. Now that your pump is ready to go, the final step is placing the pump back into your plumbing system. You can do this by reconnecting the pump to the plumbing tubes with industrial strength PVC glue and primer. Wait a full day before starting the pump as the glue and primer need at least 24 hours to dry off. So there you have it, in the matter of minutes your pump is back to new. Be on the look out for another one of Inspector Pumphead's Tips and How To's, coming soon. PumpProducts.com sales specialists are standing by to help you find the right pump or part, as well as to provide price quotes, stocking availability and shipping information. Call our toll free number 1-800-429-0800 to speak to an expert today.
-

What’s the Difference: 2 Wire vs 3 Wire Submersible Well Pumps
April 17, 2018Welcome back to another edition of Inspector Pumphead’s Quick Tips! In this space I, Inspector Pumphead, will be dispensing wisdom regarding your pump, whether it be about performance, maintenance, repair parts or navigating our site to find a new product, I’m here to help! This week we’ll be talking about the difference between 2 and 3 wire submersible well pumps. Firstly, both types feature a ground wire which shouldn’t be counted. Two wire pumps will have 2 black wires and a green wire. Three wire pumps have a black, red, yellow, and green wire. Let’s dive in and figure out which one is right for your application! The main difference between 2 wire and 3 wire well pumps is characterized by where the starting components for the motor are located. Three wire well pumps house the starting components (starting capacitors, running capacitors, relays, and thermal overloads) in a control box or panel. Control boxes are usually mounted on a wall above ground. Though the potential of failure for the parts is greater than a two wire system, the components can be easily accessed and cheaply repaired or replaced. For example, if a capacitor malfunctions on a three wire, just the capacitor itself will need to be replaced. Two wire well pumps do not use a control box. All the elements already come built within the motor or pump house itself. This allows for easier installation. However, if any of the starting components fail, the pump will have to be pulled up and the whole motor will have to be replaced. The likelihood of component failure in a two wire system is much lower than a three wire, although it is a much more expensive and time consuming endeavor if a part does fail. At the end of the day, it’s up to you to determine the more convenient approach for your application. Your circumstances may dictate one configuration over the other. Keep in mind, motors that are more than 1.5 HP requires a three wire configuration and a control box to start the heavier motors. PumpProducts.com sales specialists are standing by to help you find the right pump or part, as well as to provide price quotes, stocking availability and shipping information. Call our toll free number 1-800-429-0800 to speak to an expert today.
-
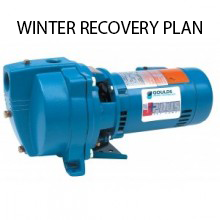
The PumpProducts.com Winter Recovery Plan: Pump Parts You Need
March 26, 2018While the first day of spring was officially March 21st, it may not feel that way for much of the country. The Northeast was just blasted with the fourth (!) winter storm of the month. As the temperatures rise and the snow begins to melt, we can finally see spring on the horizon. Before you get ready to stop and smell the azaleas, keep in mind that there are parts of your home or pumping system, that may need tending to after the nasty winter. Making sure that all your equipment is still functional is the best way to ensure that you're ready for a new season. If you read our tips on how to protect your pump during a winter storm, you will see that people sometimes install pumps outside without enclosure protection. Jet Well Pumps, like the Goulds J7S or Goulds J15, are notable examples. It's more convenient and less expensive (initially) to install the pump this way, but it could cost you down the road. If you have an open-air pump, you may be in the market for repair parts or even a whole new pump. "We are currently getting a lot of calls for replacement parts on well pumps," according to PumpProducts.com expert Lee. "What happens is that certain parts of outdoor pumps crack when the water freezes. That's why it's so important to drain those pumps before the winter." This process occurs when the water running through the pump and pipes freezes. When liquid water freeze it expands. This is due to the tendency of hydrogen atoms in the water molecules to bond as the temperature decreases; there is less thermal energy to shake and move the bonds. However, you don't need to know the science to see that your pump casing is cracked. Thankfully, PumpProducts.com carries a plethora of repair parts to help get your pump up and running again. Pump Repair Parts for Winter Recovery Common parts that need replacing, due to water freezing, include the pump casing, gaskets, and the mechanical seal. These are pump components that sit together near the inlet of the pump and interact with the water. Once the casing is cracked, it is easy for the ice to expand and seep into other parts of the pump as well. The gaskets and mechanical seal are elements that hold the entire mechanism together. Since we commonly get calls about the Goulds J+/JS+ series, we will use those repair parts as the example case. Casings: The casing or volute is technically the outer shell that holds the pump mechanism together. It is essentially the first line of defense for protecting the pump from the elements. If your casing is cracked, it won't be long before the rest of the pump starts to fail. The casing replacement for all J+ models is the 1K311, while the replacement for the JS+ series is the 1K333. Gaskets: A gasket is simply a part that fills the space between two surfaces so they can connect. The gasket is important for keeping the pump head secure and in place. The replacement gasket for the J+ series is the 5K108. Mechanical Seal: The mechanical seal is one of the most important parts of a pump as it keeps the motor separate from the volute. It is also an extremely sensitive component and thus one that often needs replacing. Both the J+ and JS+ series use the 10K10 seal which combines a rotary seal face and a stationary seal face. Those are just some of the most common repair parts we dispense during this time of year. Be sure to examine your pump thoroughly for signs of cracking in other components. Can Your Sump Pump Handle the Flooding from Melting Snow Another thing to keep in mind as winter finally draws to a close is melting snow. Depending on what part of the country you live in, mass amounts of snow will start to melt over the next few days. That snow becomes groundwater, which could quickly overwhelm your sump pump and flood your basement. Be sure to check that your sump pump is still in good working order or consider buying a battery backup sump pump to make sure you're prepared for the excess groundwater as well. Pump Products sales specialists are standing by to help you find the right pump or part, as well as to provide price quotes, stocking availability and shipping information. Call our toll free number 1-800-429-0800 to speak to an expert today.
-

How Pumps Make Quality Draft Beer Possible
March 16, 2018Happy Saint Patrick’s Day (weekend)! Also known as the holiday where overgrown people from their mid-20s to late 30s try to relive their college years by getting belligerently drunk and violent. Good times! I’ve written a little bit about the history of Saint Patrick’s Day in the past. This time, I want to tie the history of this most enjoyable of holidays into pumps. Without pumps it would be much more difficult to enjoy the magical elixir we most closely associate with this holy day: beer. Here’s a very special edition of Pumps Make It Possible. How Beer Gets Made Of course, before the beer can get pumped into your glass, brewers actually have to, you know, make the beer. Whether you consider yourself a craft beer connoisseur who only imbibes IPAs or a weekend warrior who just likes to throw back a few cold ones with the boys, you have probably given at least some thought as to how you get your tasty beer. You know it involves hops and grains and the vagaries of something called the 'fermentation process,' but how exactly does it all fit together It's actually a pretty straightforward process that dates all the way back to ancient Egypt and Mesopotamia. Perhaps the famous "Egyptian walk", was created when Hotep was drunk during the equivalent of a St. Paddy's day celebration. Cereal grains (most commonly barley) with certain sugars are the base ingredient. The grain is malted, a multi-step process in which it is soaked in water, spread on a floor for a few days and then dried at a high temperature for hours. The grain is milled and then mixed with hot water in a process known as mashing. The purpose of the mashing is to create sugars for fermenting. The liquid is then moved to a tank or kettle where it is boiled with hops. The hops add the bitter taste that offsets the natural sweetness of the milled grain. The liquid is then cooled in a heat exchanger before yeast is added. The liquid (also called a "wort" at this stage) then goes into a fermentation tank where more yeast is added. After fermenting and conditioning for a set period, the beer is then carbonated, filtered and stored. It is now ready to drink. The entire process is a little more complicated then that and modern techniques may vary by brewer, but for our purposes, those are the basics. First We Feast, did an interesting step-by-step guide with animations if you want a more detailed look. But what about the pumps How Pumps Give Us Beer As with any other type of fluid, whether it be groundwater or wastewater, beer at rest needs to be compelled to move from its source, typically a casket or keg. But unlike with water transport, the liquid is meant to retain something of its original state. Taste, flavor and freshness are paramount, particularly in a draft beer system. That is why home brewers and barkeeps alike make sure they have a quality beer pump to transport the beer to the tap in such a way that it still tastes great in your glass. Beer pumps are powered by compressed air or high pressure gas (such as CO2) which acts as a propelling force to move the beer. The gas that powers the pump and the gas that actually comes into contact with the beer, are separate. Note that excess CO2 should be properly vented. Brewers will often set a preferred PSI pressure rating which is ideal for moving beer without effecting the carbonation level or spoiling the beer. Depending on the necessary configuration of pump and keg, the beer can be moved in runs that are either long or short, horizontal or vertical. The important thing is that you use the correct pressure setting for moving the beer. Also make sure all fittings are tightly attached and that the beer lines are periodically cleaned. Goulds Water Technology makes beer pumps and PumpProducts.com might be adding some in the future. In the meantime, I hope you now have an appreciation for how important the humble pump is for giving you something that you probably enjoy with great enthusiasm. Just when you thought pumps were boring. Here's to beer, the cause of (and solution to) all of life's problems. Plus let's not forget, here's to the pumps that make it possible. Enjoy the holiday. Do you have any ideas for future editions of "Pumps Make It Possible" Let us know in the comments. Pump Products sales specialists are standing by to help you find the right pump or part, as well as to provide price quotes, stocking availability and shipping information. Call our toll free number 1-800-429-0800 to speak to an expert today.
-
Inspector Pumphead’s Quick Tips: How Will a Winter Storm Effect My Pump?
March 7, 2018Welcome back to another edition of Inspector Pumphead’s Quick Tips! In this space I, Inspector Pumphead, will be dispensing wisdom regarding your pump, whether it be about performance, maintenance, repair parts or navigating our site to find a new product, I’m here to help! In this edition, we will be covering how a winter storm (and cold, icy weather in general) can impact your pumping system, as well as the steps that any homeowner can take to minimize or prevent adverse effects. This topic is especially timed as much of the Northeast (PumpProducts.com’s backyard) is currently experiencing winter storm conditions today on 3/7/2018. If you’re in the area, you still have some time to follow these tips to make sure your system will be able to face the storm. Tip 1: Remove your outdoor non-enclosed pump so that freezing water does not crack the casing. Many homeowners will have an external pump serving an outdoor application. Some common outdoor applications include field irrigation with the Goulds GT IRRI-GATOR series being particularly popular for such services. Above ground jet well pumps such as the Goulds J5 or J7S are also commonly found exposed to the open air. This is perfectly reasonable as it is much more convenient to install and operate some pumps outside without an enclosure. The downside is that winter storm conditions will cause the water running through your pump to freeze. Depending on the temperature and the time left untended, the frozen water will eventually expand and crack the pumps casing. The worst case scenario is having to replace the pump and probably some of the piping as well. Avoid this problem by turning off the external pump and removing it from your outdoor configuration until the storm passes and the temperature rises. It may be annoying and it will deprive you of a pumping service for a little bit, but it is far preferable to replacing that pump. Note that pumps buried beneath the frost line and in an enclosure should be immune to freezing. Tip 2: Be prepared for heavy waterflow to tax your sump pump once the snow starts melting. This blog is being written in March and if you live in certain parts of the country, you know that can mean wild weather fluctuations on a day-to-day basis. One day the ground is covered in several inches of snow, the next it’s sunny, 50°F and all that snow is melting. Naturally, the melted snow will seep into the ground and create more groundwater than your sump pump (whether in a basement or backyard pit) is typically used to pumping. The excess groundwater forces the pump to cycle more frequently and transport a higher capacity GPM than it is designed for. Naturally, this could burn out the pump. Which ties into our next tip. Tip 3: Have your backup pump ready. If your pump does fail due to overcycling, there is no better feeling of reassurance than knowing you have a backup pump of the same make and model ready to go. If it is the same pump model with the same specifications, you can simply swap in the replacement without losing much pumping service. Of course, there is another way that a winter storm could disrupt your pumping system: power failures. High velocity winds damage power lines and cause blackouts. Some areas of Massachusetts still do not have power after last week’s Nor’easter. In such a situation, it pays in spades to have a battery backup sump pump. These battery backups operate when power is lost and give you peace of mind, letting you concentrate on staying safe and warm during the storm. Do you have any other pump tips or general tips for surviving a winter storm Let us know in the comments! Pump Products sales specialists are standing by to help you find the right pump or part, as well as to provide price quotes, stocking availability and shipping information. Call 1-800-429-0800 to speak to an expert today.
-

Inspector Pumphead’s Quick Tips: Does My Online Pump Order Have a Warranty?
February 28, 2018Here’s another minty-fresh edition of everyone’s favorite semi-recurring content feature: Inspector Pumphead’s Quick Tips! Inspector Pumphead says make sure your pump has a warranty before you purchase In this space, I, Inspector Pumphead from Pump Products, will be sending out friendly reminders and dispensing basic tips for ordering, maintaining and servicing pumps. The Inspector is in and here to help! Quick Tip: Many online pump vendors do not honor or service warranty claims. Imagine, if you will, the feeling of finally receiving the brand new Zoeller sump pump you ordered a few days ago from PumpProducts.com. The look! The feel! The smell! The high quality engineering! And of course, nothing can beat the feeling of knowing that all your sump application needs will be met by a sturdy, reliable and high performing pump. But then… the unthinkable happens. Something cracks or breaks. It may be a seal or a bearing. Or maybe the pump just seems to stop running. You check and make sure that there’s nothing clogging the pipes. There is definitely something wrong with your brand new pump and you don’t know what to do. Forgiveness, please, for bringing up such a terrifying nightmare scenario. It’s scary and I don’t want to expose anyone to trauma. The intrepid shipping team at PumpProducts.com works hard to check that every pump that leaves our warehouse is in fine working condition (and it should be noted that Zoeller also factory tests all pumps before they are shipped). But still, we live in a broken and imperfect world. These things happen. That’s why PumpProducts.com has a whole department dedicated to processing warranty claims for all of our manufacturing partners. These dedicated professionals will take all the pertinent information about your pump order, fill out the attendant paperwork and communicate with the factory to make sure you get a replacement pump in a timely manner. As a premier distributor we are authorized to file these claims. We go above and beyond for our customers. The thing you should understand is that many big online vendors may list the same pumps at similar prices but without a warranty backing those orders up. If something goes wrong with the pump, you would have very little recourse for obtaining a replacement. You might just have to pay the cost of a full new pump. We all hope to make it through life unscathed, but unfortunately what can go wrong often will go wrong. That’s why it’s important to have experienced professionals on your side, working to make things right. And if you want a little extra peace of mind, a battery backup pump is always a fine choice. Pump Products sales specialists are standing by to help you find the right pump or part, as well as to provide price quotes, stocking availability and shipping information. Call 1-800-429-0800 to speak to an expert today.
-
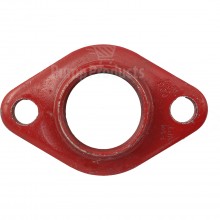
Know Your Pump Repair Parts: Flanges
February 19, 2018Know Your Repair Parts: Flanges Nothing in life lasts forever. Luckily Pump Products sells a variety of repair parts and accessories guaranteed to restore life to your pump or system. Today’s topic: flanges. What are flanges Flanges are used to connect pipes to pumps, valves, and other components. They come in a variety of shapes and sizes to specifically suit different applications. Flanges can be made of such materials as bronze, cast-iron, stainless steel, and brass. Below you will find a brief description of some of the more common types of flanges. Types of flanges Slip On Flange Slip on flanges are slipped over a pipe and fillet welded from both the inside and the outside to strengthen the connection. These flanges are suitable for low temperature and pressure applications. Slip on flanges come at a low cost and require less accuracy when cutting a pipe to length. Threaded Flanges Threaded flanges are fast and simple to attach. Threaded flanges are similar to slip on flanges however the bore is threaded which allows for assembly without welding. This type of flange is not suitable for high pressure and high temperature applications. Lap Joint Flange Lap joint flanges are divided into two parts, a stub end and loose backing flange. The stub end is butt welded to a pipe and the backing flange can move freely over the pipe. Lap joint flanges are used in applications where space is minimal and intermittent dismantling is necessary for fixes and inspection. Welding Neck Flange Welding neck flanges are designed to be joined to a piping system by butt welding. They tend to be more expensive but are suited for high pressure applications as they feature the greatest joint integrity. Pressures are transferred from the flange to the pipe. The inner diameter of the flange matches the piping’s diameter, which also reduces turbulence and erosion. Socket Weld Flanges Socket weld flanges are similar to slip on flanges. Pipe is fitted into the female sockets and fillet welded around the hub of the flange. Socket weld flanges are preferable for smaller pipes and high pressure applications. An internal weld can be applied in certain extreme pressure applications. Blind Flange Blind flanges do not feature bores and are used to seal an end of a piping system or opening. They are most common when easy access is needed for inspection. Flanges are an absolute necessity for ensuring the smooth operation of your system. Visit our accessory section to see the multitude of flanges Pump Products carries from the most trusted brands in the industry. Pump Products sales specialists are standing by to help you find the right pump or part, as well as to provide price quotes, stocking availability and shipping information. Call our toll free number 1-800-429-0800 to speak to an expert today.
-

Inspector Pumphead’s Quick Tips: Know Your Frost Line
February 9, 2018Here’s another minty-fresh edition of everyone’s favorite semi-recurring content feature: Inspector Pumphead’s Quick Tips! In this space, I, Inspector Pumphead from Pump Products, will be sending out friendly reminders and dispensing basic tips for ordering, maintaining and servicing pumps. The Inspector is in and here to help! Quick Tip: Know your frost line before burying a sump basin your backyard Punxustawney Phil has spoken and sadly we still have some ways to go before winter ends. For those of us in colder climates, that means hats, gloves, warming up your car before you drive and knowing your frost line. The frost line is simply the maximum depth in which the groundwater in your soil is expected to freeze. From a pumping perspective, this means that the discharge line for your sump pump must be beneath this line. Otherwise, the pipe may freeze, which in turn will damage your pump. In addition, any kind of tank or basin you bury in your backyard will also have to below the frost line. Luckily, it is not too difficult to determine your frost line - this map from Hammerpedia is a solid general overview of what the line might be in your area. For a more specific reading for your local area, you can usually contact your local plumber to find out the frost line. It's a simple step that will prevent freezing and damage. Good luck and let's make it through the rest of this God forsaken winter! Pump Products application engineers are standing by to help you find the right pump, as well as to provide price quotes, stocking availability and shipping information. Call our toll free number 1-800-429-0800 to speak to an expert today.
-
Inspector Pumphead’s Video Classroom: How Check Valves Work
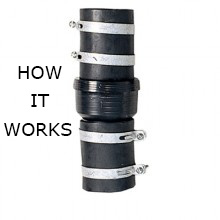
February 7, 2018Welcome back to another exciting edition of Inspector Pumphead's Video Classroom! In this feature, I, Inspector Pumphead, will tackle a common question about pumps, parts or water systems using fun visual aids. This video is designed for those who like visual learning or enjoy a bit of fun in the classroom! In today's feature, Pump Products sales specialist Nick is talking about check valves! He will explain what check valves are, why your pump needs a check valve and a little bit about the variety of check valves that you can use for a given pumping application. What is a Check Valve A check valve is simply a valve that is installed on a discharge pipe leading away from pump and that acts as a backflow preventer to stop any discharged water from travelling back the way it came. This is important because water that flows back into the pit or basin containing the pump will activate the pump, causing it to cycle more frequently than is necessary for the system. Eventually, this will cause the pump to burn out and break down. How It Works The two main types that Nick talks about are a spring controlled check valve and the more common "flapper" check valves. Spring controlled valves use water pressure to move a spring, which opens the valve before closing. They are well-suited for use in pressure boosting applications and often use a threaded connection. Most check valves you encounter will be flapper-style valves, often in standard sump or sewage applications. Such check valves will have a thin, lightweight plastic door that opens in a flapping motion away from the pump (in the direction of the flowing water). Once the water stops flowing, the door shuts and prevents backflow. Different types of connections can be used. For instance, the Liberty CV150 uses flexible Fernco rubber connections, while others use PVC solvent. The Zoeller 30-0040 is a "quiet check" valve that reduces noise and the risk of water hammer. The Liberty BCV150 is a combination ball and check valve with a union connection. The check valve prevents backflow, while the ball valve functions as an isolation valve. The structure allows for easy disassembly without disturbing the piping. The check valves used in the video are ultimately a sample of the many varieties you can find and use for your pumping application. If you do not see the check valve you want or need listed here, be sure to contact us and we can get it for your system. Pump Products sales specialists are standing by to help you find the right pump or part, as well as to provide price quotes, stocking availability and shipping information. Call our toll free number 1-800-429-0800 to speak to an expert today.
Connect With Us
Secure Shopping
Our Memberships
Service Excellence
CALL US: 1-800-429-0800

COMPANY INFORMATION
CUSTOMER SERVICE
BUYERS GUIDES
PRODUCT SUPPORT
Call Toll Free: 1-800-429-0800
 "Ask Inspector PumpHead"